


Tony Bracci talks you through a driven shooting lesson

Whether it’s Hampshire partridges or Devon high pheasants, let’s look at the techniques you need to master in this driven shooting lesson.
The warm-up
I’ll start my driven shooting lesson on the first stand where I would set up a regular driven target; let’s call it a warm-up stand. On this I would be assessing a number of things about your shooting. Safety is a high priority and even though we are on the shooting ground I would not let a game shooter close a gun up horizontally. When we arrived at the stand, I would be pointing out the location of the traps and the safe areas to shoot. The gun should be closed pointing at the floor, then brought up through a safe area so the barrels are up in the air. The safety catch should be pushed off as part of your mount, which is the next area of focus.
Ready position
The gun mount is greatly influenced by the ready position and everyone’s ready position is different. Standing bolt upright is not going to give you a consistent mount. To find your ready position, place your lead foot forward slightly and then mount the gun, with your head down on the stock. Keeping your head still, lower the gun so the stock is in line with your forearm. This will feel strange but gives you a perfect ready position. Now, I am not recommending that you stand like this while waiting for the birds to arrive. While waiting, you should stand normally with weight on both feet and your barrels directly up in the air. When you get a sense that something is going to happen, assume the ready position and bring your barrels down to where you are looking, keeping them above the treeline but where you expect the bird to come from.
There should be a distinction between rest and ready positions. Once the ready position is sorted the mount will be more consistent; it should be smooth and to the shoulder and cheek at the same time. It is a common mistake to mount the gun to the shoulder and move the head independently of the gun on a driven target as it creates erratic misses, usually in front. As the gun is mounted to the cheek, the gun should drive along the line the bird is travelling on with the head connected to the stock.
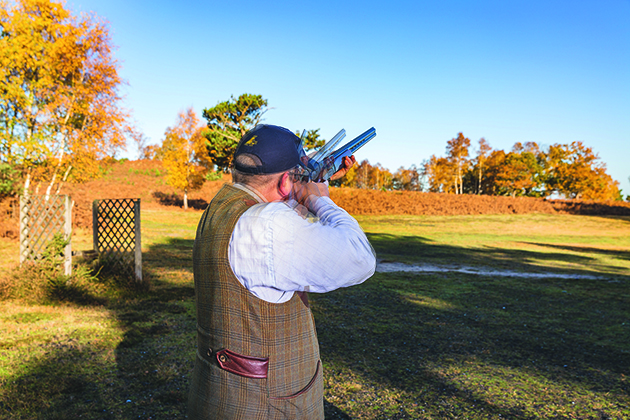
After straight targets, those to the left and right are tried
The targets
Once we have broken a few straight driven targets, I inform my client that the next target is coming to the left. Shooting driven targets to the left and right can cause the body to tighten and pull the gun off line, especially if the feet are not moved to address the bird. Here we would be looking at how and if any adjustment needs to be made. Sometimes I see people almost squatting to allow the body to swing to where the bird is going. Aside from being awkward it also gives inconsistent results.
The correct and graceful way of dealing with a driven target to the left (for a right-handed Shot, reverse for left-handed) is to move the left foot to the expected shooting position, keeping the eyes and muzzles with the target. Once the foot is in place, the gun can be mounted and the shot taken. For a driven target to the right, the right foot should be moved back and the left moved round to the expected shooting position, again keeping the eyes and muzzles on the target. Once the feet are in place, the gun can be mounted and shot taken. This will allow the body to swing the gun and rotate smoothly and on the right line. The shot should be taken in front or in line, which also allows you to take a second shot if the first one is unsuccessful.
Once the warm up and general assessment are done we can then move on to more specific targets for the client’s needs. These can be higher, faster, in among the trees for snap shooting, out in the open, when you see them coming from a long way off, or a mixture of all of these.

The swing should continue as the shot is taken
Follow through
The follow-through as the shot is taken can be an area of concern. We see many clients measuring and as a result stop the gun once the gun is assumed to be in the right position. This usually results in a miss behind. We are dealing with a moving target and, as such, should have a moving gun to achieve the best results. The swing should be smooth and continue as the shot is taken. I think the main reason game shooters stop their gun as the shot is taken is either because they using too heavy a load in their cartridges, causing the body to tense up as it braces itself in anticipation of the recoil, or searching for the perfect sight picture. Once seeing the preconceived picture, the gun stops. The whole process should be a smooth and fluid swing, moving the gun on the same line as the bird is travelling.
The more a shooter thinks about where the barrels are and where the gun is, the less focus there is on the target.
If you can find time to get a practice session and a driven shooting lesson in with a coach before you venture into the field, I am sure it will make you shoot better and enjoy your days even more.