


Airgun marksmanship is everything, so Mike Morton runs through four key principles that help ensure those pellets land exactly where intended

Airgun marksmanship is a person’s ability to hit what they’re aiming at, and in order to achieve this there are four basic principles that need to be applied. I was recently asked to teach a lesson on this subject. That sounds easy enough, because we adopt these principles each and every time we compose and take a shot, don’t we? Hmm, maybe.
Like many airgun shooters, I like to shoot several times a week, but rarely give much conscious thought to the way I’m doing it. And when it came to naming these fundamental principles, I’m embarrassed to admit that I couldn’t actually list any of them in a proper, structured manner.
Instead, I had to go back to basics and read up about what I’d previously been taking for granted. Having done some research, it turns out I’d been doing most of it reasonably well, but hadn’t been paying enough attention to some important points.
So whether you’re an old hand who needs a refresher or new to our wonderful sport, here’s a rundown of what to remember in order to take a truly accurate shot.
The four airgun marksmanship principles are 1: Support and Position, 2: Pointing (Natural Alignment), 3: Aiming (Sight Alignment) and 4: Release of Shot and Follow-Through.
They can be remembered by using the acronym SPAR – Support, Pointing, Aiming and Release. While these principles were originally created to teach people the basics of shooting a powder-burning rifle, they are just as relevant to air rifles.
To save repetition, I’ll discuss the airgun marksmanship principles with a right-handed shooter in mind. Just use the opposite if you’re left-handed.
(Want more advice on how to become a better airgun shooter? Don’t miss our advice on zeroing a scope, how to make your airgun more accurate, how to wash, size, weigh and lubricate your airgun pellets, and how to use an air rifle for pest control).
1. Support and Position
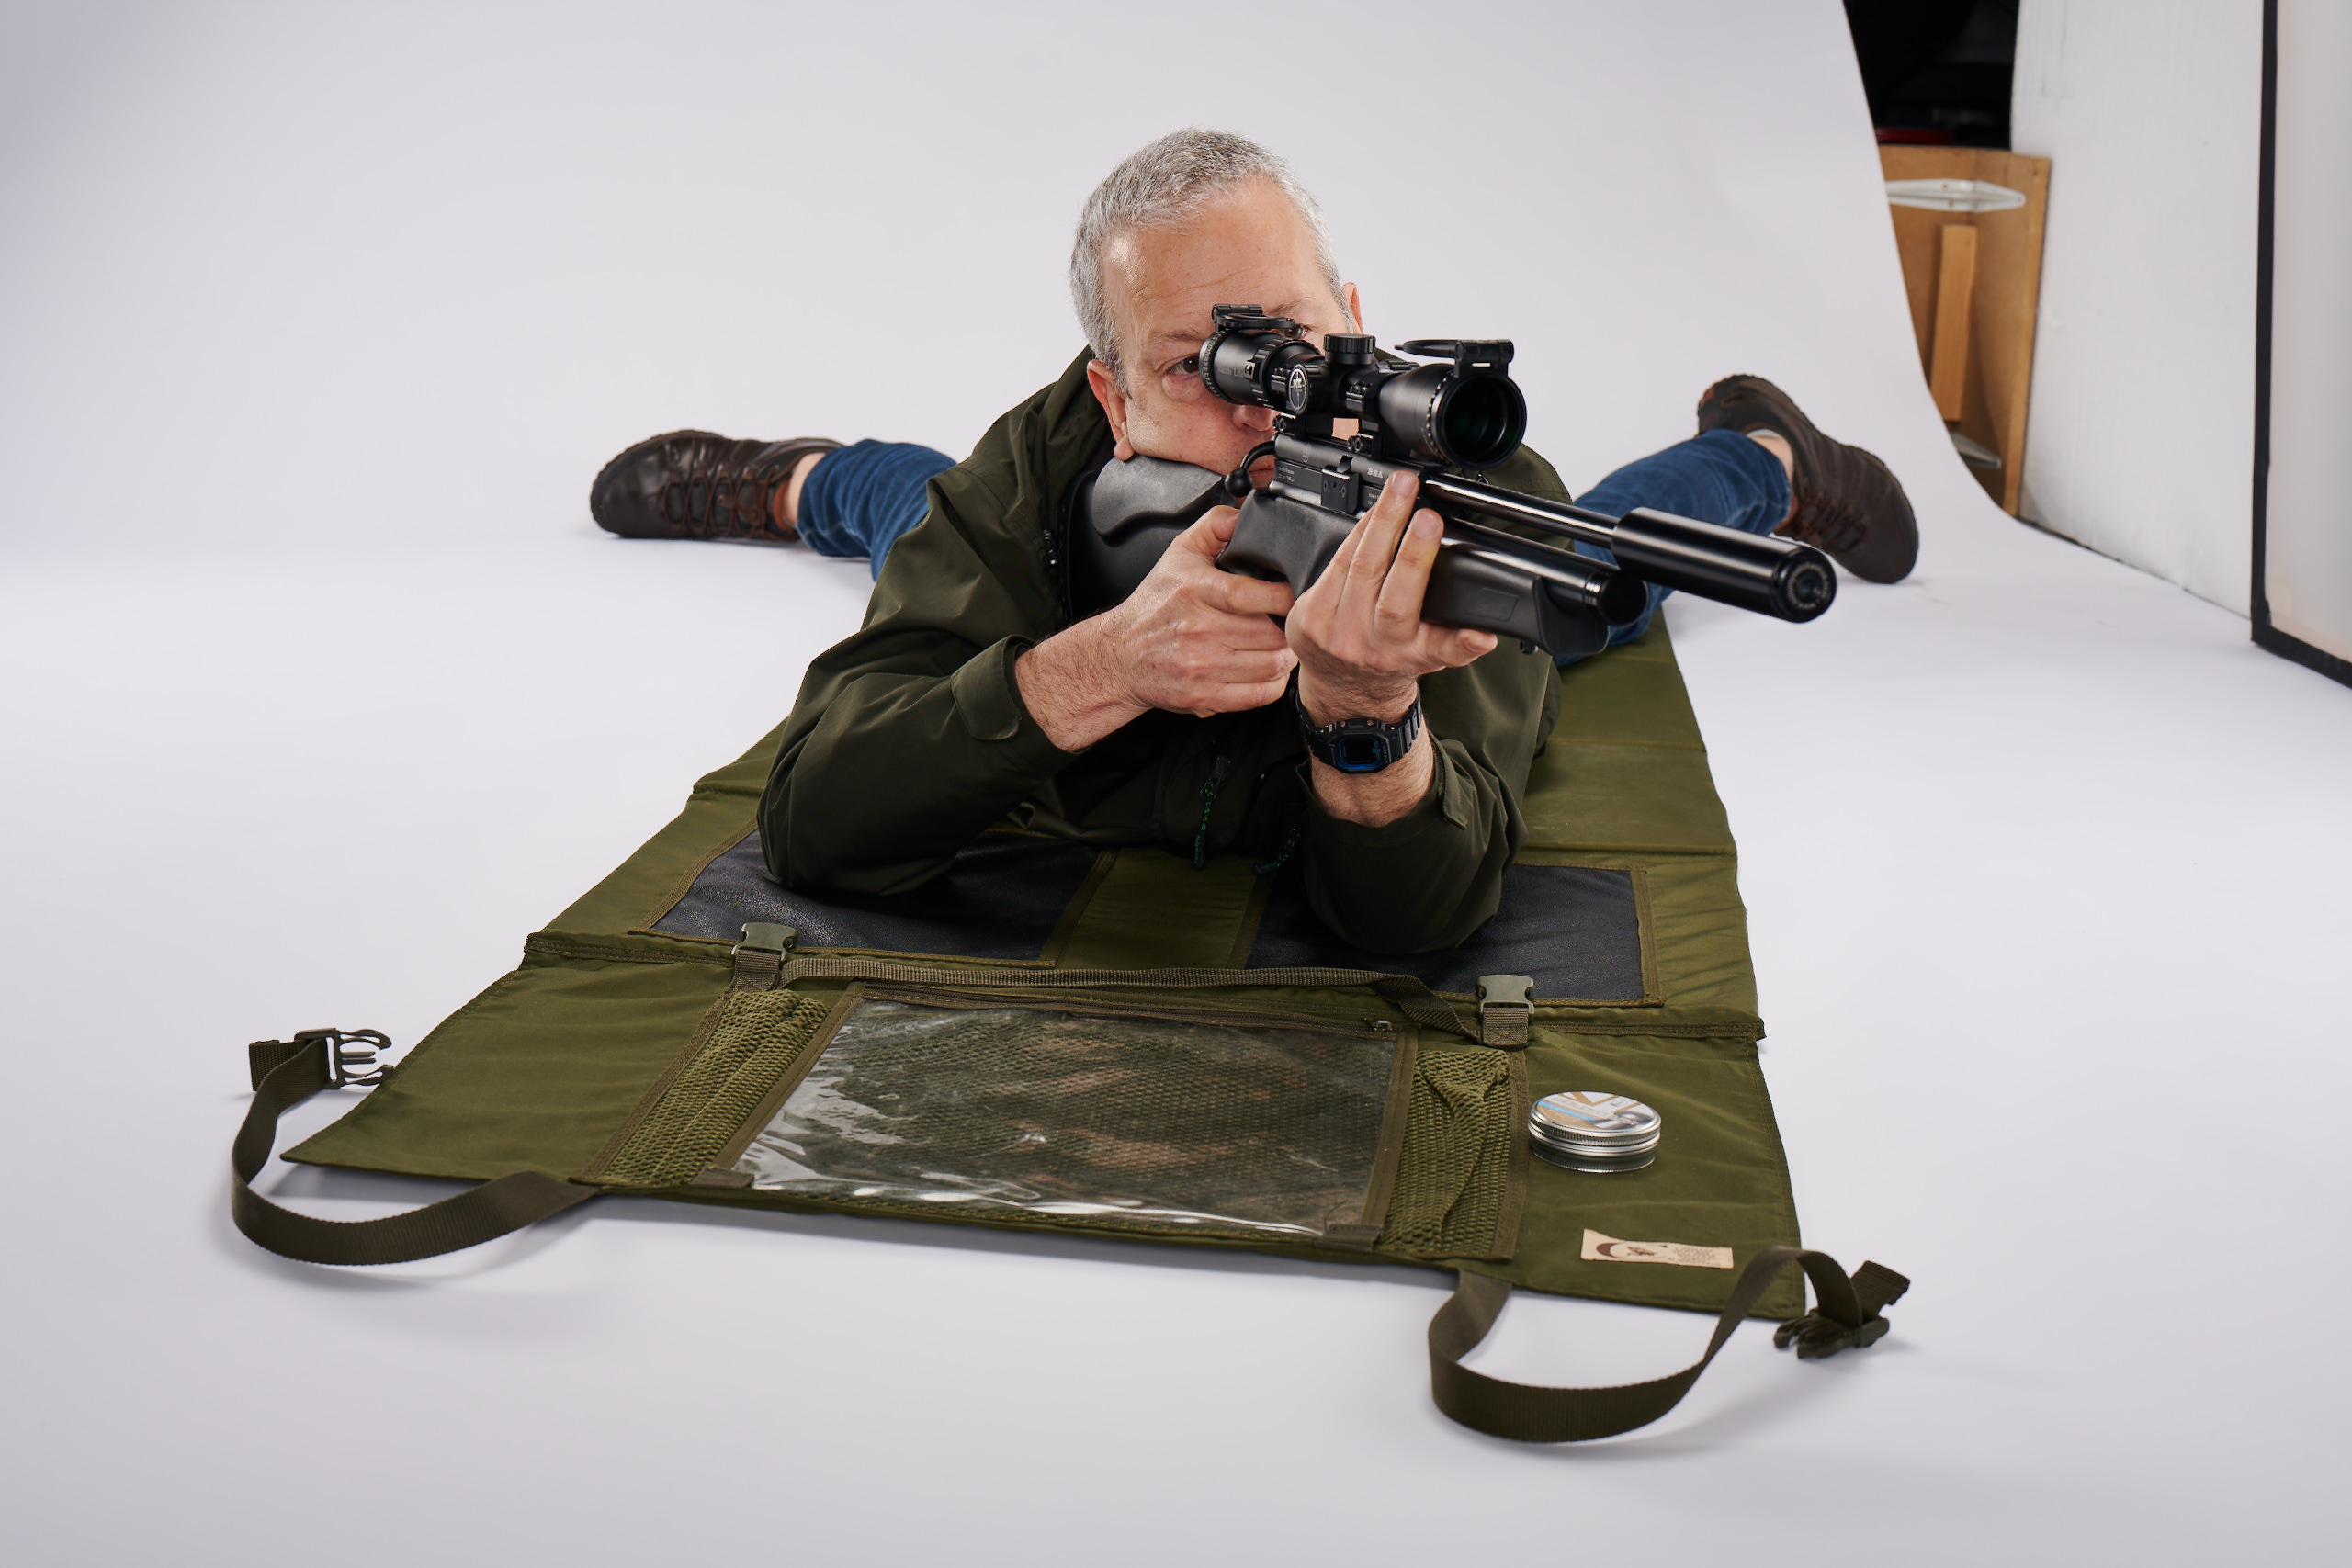
Your position and hold must be stable and firm enough to support the rifle in the aim
The position that offers the most support is prone. Although it’s not always possible to adopt this position in the field or at the range, it’s definitely the best one to use when you can, especially for the newcomer, as not only does it provide maximum support, but it also ensures the rifle is always pointing in a safe direction while you work to develop your technique.
There are two semi-official ways of lying to maximise stability and comfort when in the prone position, but I like to add an unofficial third one into the mix.
Leg Position 1: The shooter should align their body roughly straight on to the target, with the legs spread approximately shoulder width apart and the toes pointed out. The toes-out position can be uncomfortable for some people, in which case the shooter can adopt a toes-down, heels-up position instead.
The right leg should be roughly in line with the rifle, helping to stabilise the position and absorb any recoil, which will be helpful for people shooting springers and FAC-rated pre-charged pneumatics. This leg position will result in the chest being lower to the ground, which can accentuate the fall and rise of the muzzle as the shooter inhales and exhales.
Leg Position 2: This time, the body is aligned slightly to the left of the line of fire to the target, and the right knee should be bent and brought up towards the body. This raises the chest off the ground, making it easier to breathe while also lessening the effect breathing has on muzzle movement. Leg Position 2 creates a higher firing position that’s still well supported, although it’s not quite as stable as Leg Position 1.
Leg Position 3: This position lets the shooter place their legs however they like, which will naturally be the position they find most comfortable, depending on the ground they’re lying on. My favourite position is to cross one ankle over the other directly behind me. It’s not particularly stable and I still need to watch my breathing, but it’s something I can adopt for longer periods of time without fidgeting.
Anyone who’s been shooting for a while will no doubt have their own preferred prone leg position, but for anyone new to the sport it may be worthwhile experimenting to see which position works best for you.
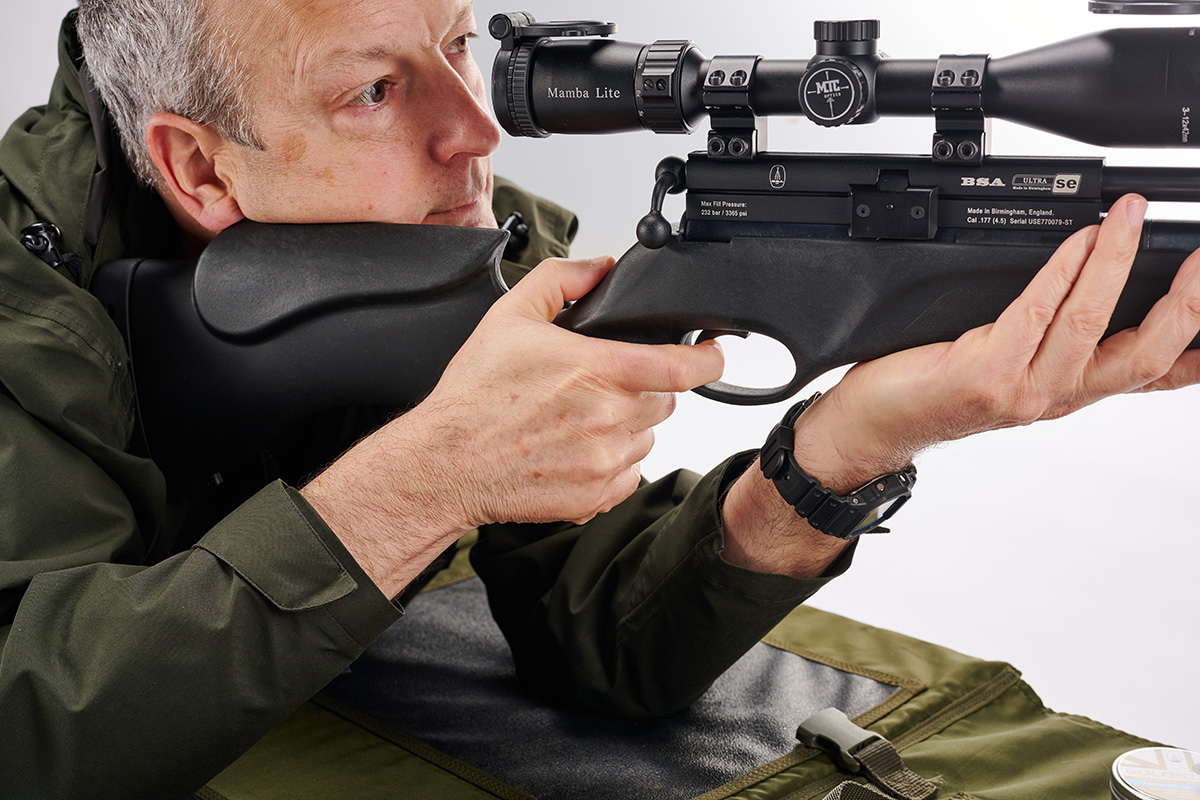
With the leg position sorted, the shooter should now hold the rifle with the butt firmly in the shoulder, with their right hand on the pistol grip and the left hand cradling the forend in the palm of the hand.
The rifle should be held with a good, but relaxed, grip, using the body’s natural support, firmly supported with angled elbows. This means most of the weight of the rifle will be taken up by the skeletal structure of the body rather than by muscular effort.
2. Pointing (Natural Alignment)
The rifle must point naturally at the target, with minimal physical effort

Relax, don’t strain: If the shooter is straining to line up with the target then there is no natural alignment – this is fixed by moving the body, not the gun
In a perfect world, when you adopt a well-supported prone position the barrel of the rifle should naturally be pointing directly towards the target, however it’s often the case that it ends up being slightly off to one side or the other.
When faced with this, most shooters will automatically twist the rifle round until it is pointing at the target, but while the rifle is now nominally pointing the right way, it will not be naturally aligned.
Instead, the shooter should move their body slightly until the rifle is pointing in the correct direction. Muscles tire easily, and tired muscles mean there will be no consistency in your shooting, so the rifle must be held upright and pointed naturally at the target without any undue physical effort.
3. Aiming (Sight Alignment)
Your sight alignment and sight picture must be correct
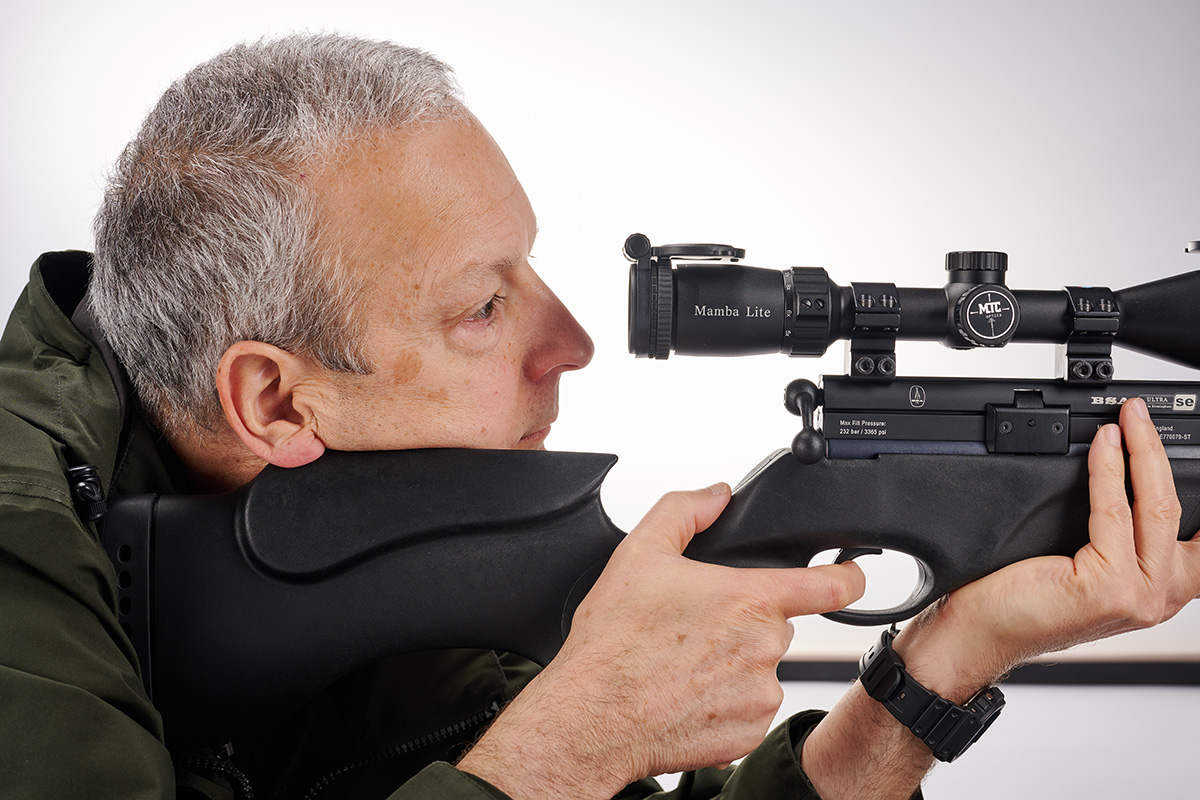
Correct head position: The head should be upright, with the correct eye relief set and the shooting eye centred behind the sight
Good head and eye alignment with any sighting system is important, but even more so with a telescopic sight, where parallax error can throw off even the most carefully aimed of shots. For this reason it’s essential to centre the pupil of the right eye to the ocular lens, while also maintaining the correct distance between the eye and the ocular lens, which is known as eye relief.
With the butt of the rifle in the shoulder, the shooter should be able to close their right eye, bring their head to rest on the rifle, with their right cheek on the cheekpiece, then open their eye to find a perfect sight picture through the optic.
If the shooter’s head is too high or too low, then they will have to make adjustments to the cheekpiece or butt pad, where the rifle allows, and/or use higher or lower scope mounts. If none of this is possible then the butt can be positioned higher or lower in the shoulder, but they should avoid resting it directly on the collarbone as this will not provide a stable or consistent hold.
Eye relief can be adjusted by either loosening the rings and sliding the scope forwards or backwards as needed within the mounts, or by loosening the mounts themselves and repositioning the whole sight and mount assembly over the dovetail or Picatinny rail.
4. Release of Shot and Follow-Through
The shot must be fired and followed through without any undue disturbance to your position
Hold tight: Remain in the aim once the shot has been taken to ensure you don’t disrupt your position while the pellet’s still in the barrel
Instead, the shooter first needs to control their breathing, with some people preferring to take the shot after a full exhalation. I used to breathe in, then out half-way and then take a shot, but a coach recently explained to me that it’s better to have empty lungs.
They reasoned that empty is empty, whereas a shooter can’t really judge how much air is in their lungs, and therefore by how much their chest is expanding or contracting, if they are holding onto a half-breath. But as always with shooting techniques, what’s best for you is what feels most comfortable.
Bipod fitted: It’s even easier to apply the marksmanship principles if you have the advantage of a front support like a bipod
Trigger control comes next, being fully aware of how the first and second stages feel and behave on the particular rifle you are using. Some novice shooters get so anxious about taking the shot that they snatch the trigger, almost wanting the experience to be over and done with as soon as possible. However, a gentle squeeze, applying more and more pressure until the trigger breaks, is far more likely to result in an accurate shot.
I like to stay in the aim for count of three after the shot has been released. This may seem like overkill, but it ensures there is absolutely no movement that could affect the flightpath of the pellet. In the case of a springer, recoil may interfere with point of aim momentarily, but it should still return to point naturally at the target once the firing cycle is over.
Only then should the shooter release the pressure from the trigger blade and either cock the rifle ready for the next shot to be taken, or make safe as appropriate.